
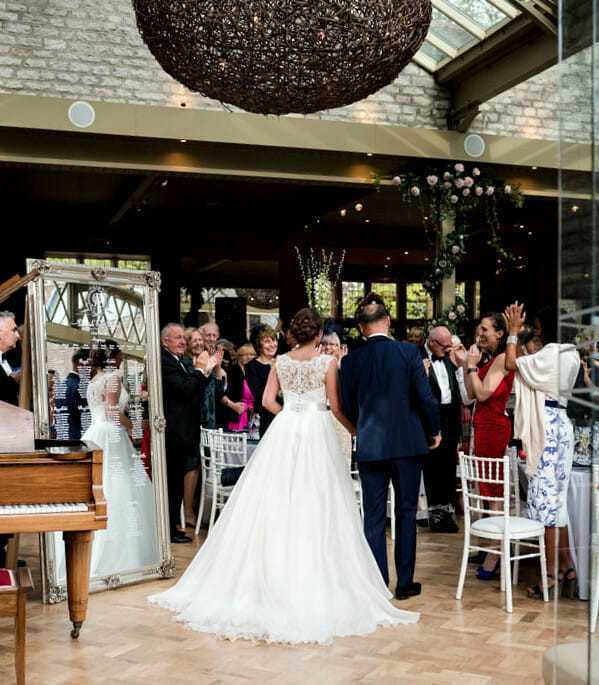
MIRROR TABLE PLAN
We specialise in custom table plans.
Create a timeless, glamorous mirror table plan.
How To Guide
Make a mirror/glass seating plan table plan with our vinyl decals. Easy.
With our peel n’ stick vinyl decals, you can adopt the trend for using mirrors and glass and DIY a simple, elegant and clean seating chart table plan.
If you have already purchased out vinyl decals, this post will help you apply them easy and with great quality.
Watch the video and FOLLOW ALL 10 STEPS to make your mirror table plan successfully.
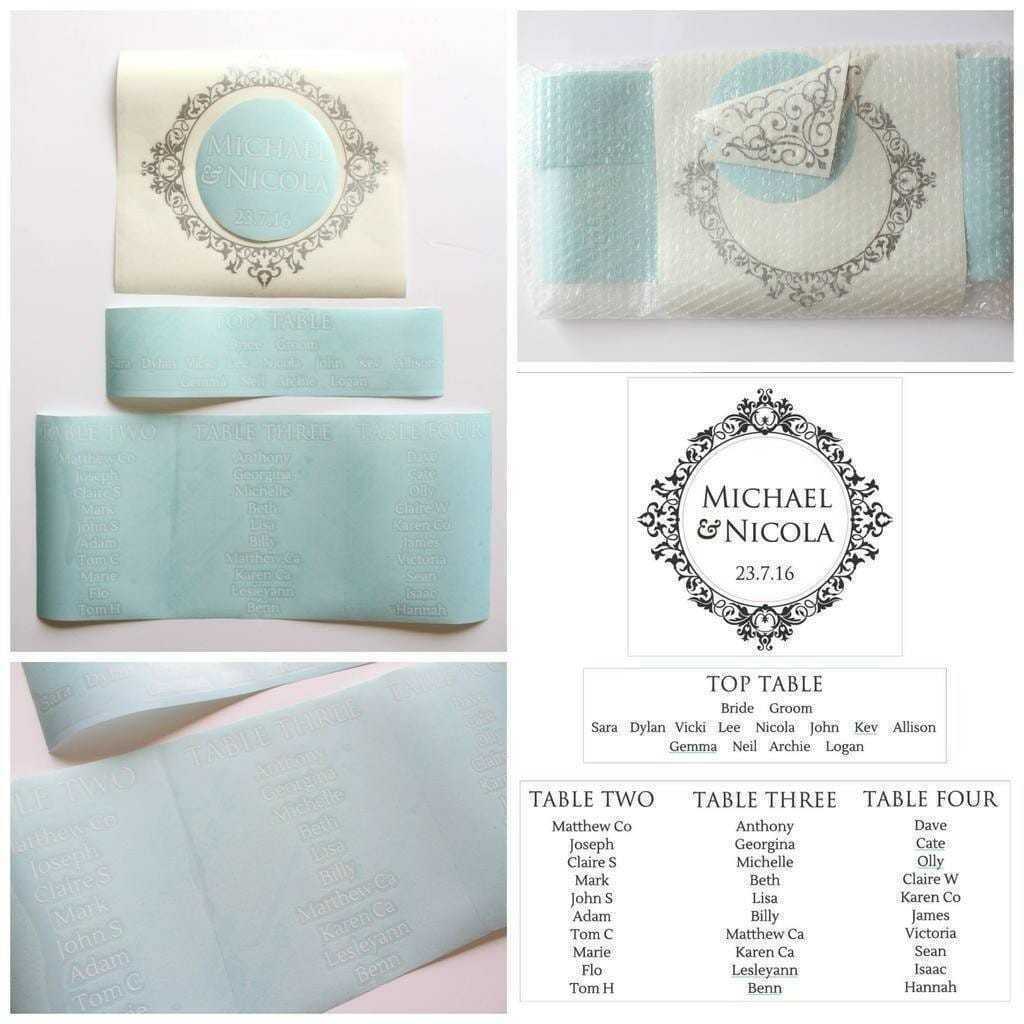
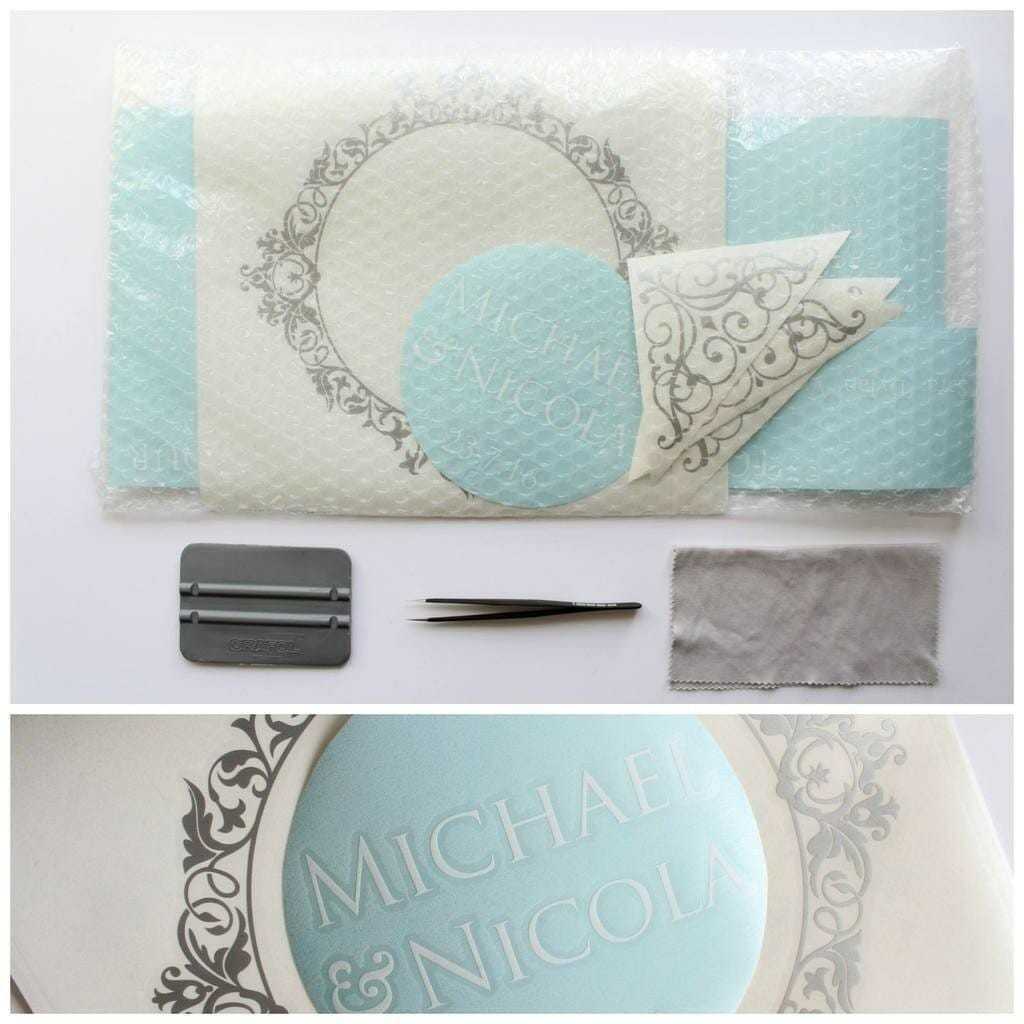
1. Unpack and lay out
Unpack your vinyl sheets. Print the digital proof which we have signed off and use as a guideline to it all lay out. It is best to do it first on the mirror itself.
2. Prepare the tools
You MUST use a squeegee. We provide one with every order.
It is important to press the letters really well with a hard flat rubber surface.
This will make all the difference in removing the vinyl from the transfer tape and applying on the mirror with ease.
The other two tools which will be good to have are a weeding tweezer (or just any regular pointy tweezer) and a cloth for glass.
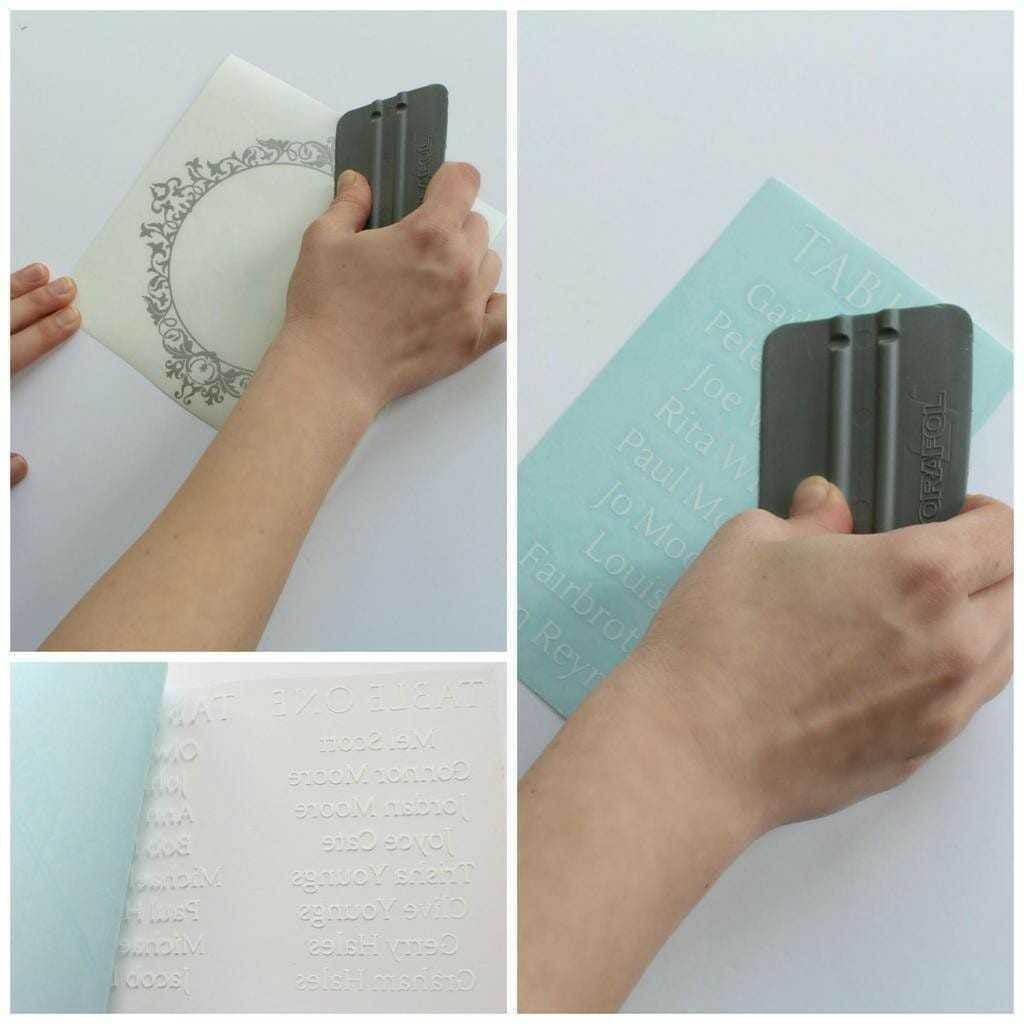
3. Press really really well
Press the vinyl sheets really well! Depending on your individual order, you might get a few tables one one sheet on each table on a separate sheet.
First, press the back of the vinyl sheet for approximately 30-40 seconds FOR EACH TABLE and then the front where the transfer tape is for further 30-40 seconds. Remember to press all sides evenly and hard.
If your design is more complex and consists of more than 10 tables, you might find it easier to temporarily keep the vinyl sheets on the mirror BEFORE the transfer tape is removed.
You can use small strips of sellotape to keep the vinyls in place.
Then, you can execute Step No 3 on the mirror itself.
4. Remove the transfer tape
Even though you’ve press the vinyls well with the squeegee, you might get a few letters stuck on the sheet.
If that happens, roll the transfer tape slightly just to cover that letter and press until the letter doesn’t detach from the sheet.
Best results are achieved if you keep a 45 degree angle between the vinyl sheet and the transfer tape (unlike me on that picture).
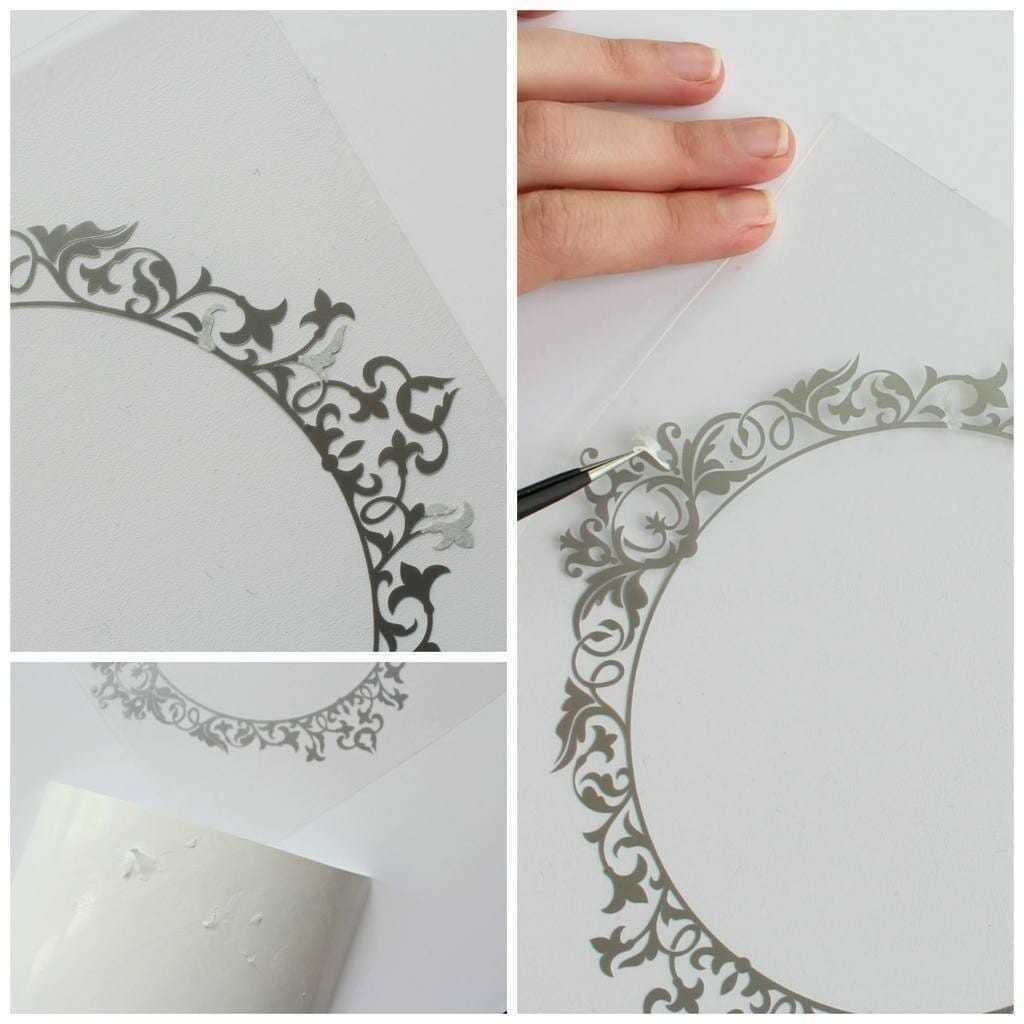
5. Weed the vinyl
You might get a few bits of paper stuck to the sticky side of the vinyl like on the below picture.
This happens if the blade cuts slightly deeper than the rest of the vinyl media.
It is rear, but you may need to remove a few of the paper bits with a pointy tweezer.
6. Stick on the mirror
If you haven’t already secured the vinyl sheets on the mirror with tape (to know its exact position), now its time to get really precise with placing the vinyl lettering and transfer tape on the mirror.
Keep a steady hand.
Hold the transfer tape in the top corners and place gently on the mirror.
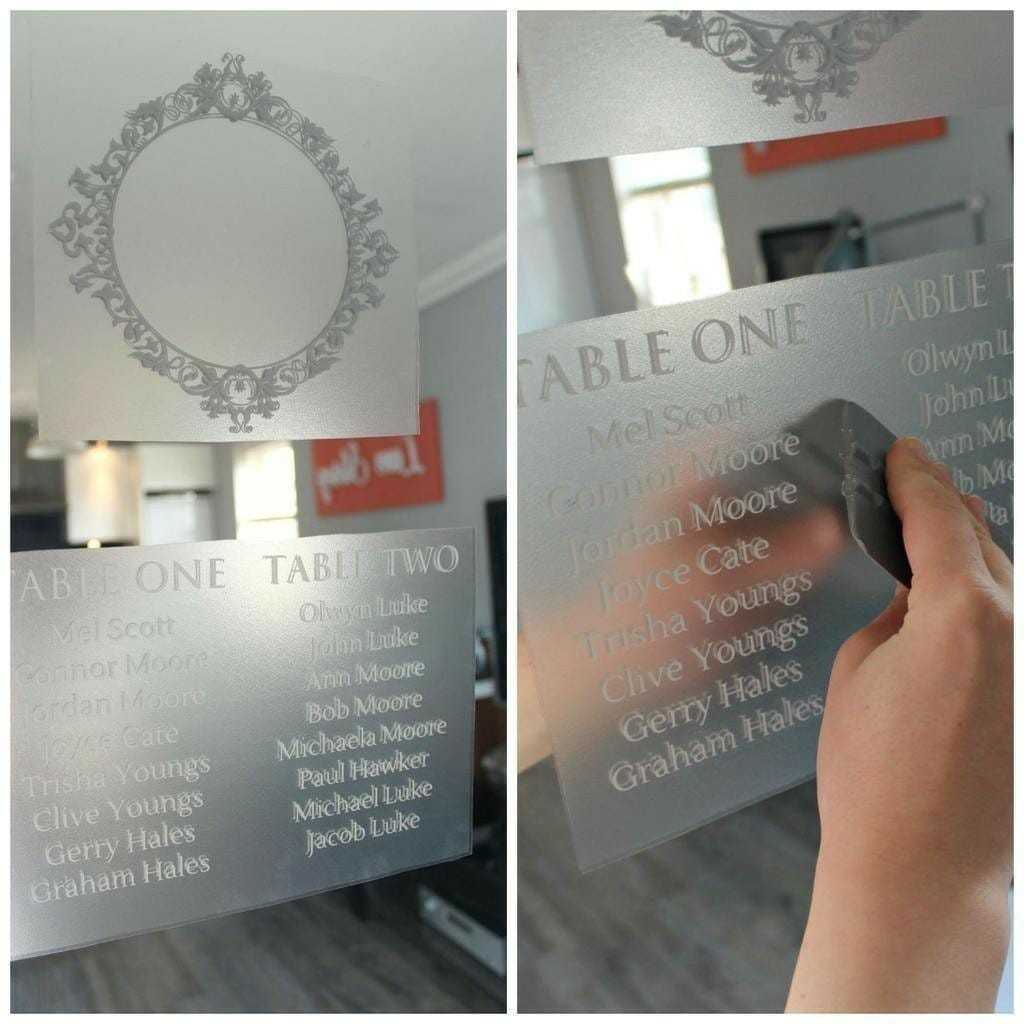
7. Press and press and press with the squeegee
This is your most important, yet most relaxing step.
The transfer tape is on the mirror. Well done. You can relax for a minute.
Press the vinyl lettering through the transfer tape with a squeegee A LOT. Before I made the video where I am pressing the two tables for approximately 40 seconds, I did another minute off camera.
You really have to take your time with this and almost press every letter individually, especially the letter “i”, because of the dot.
8. Remove the transfer tape at 45 degree angle
If you have done Step 7 correctly as described above, removing the transfer tape should be a very satisfying and pleasurable experience.
Remove the transfer tape at approximately 45 degree angle and only the vinyl lettering will stay on the mirror.
You may get a few letters that stay stuck on the transfer tape, same as when you were removing them from the vinyl sheet in Step No 4.
Similarly, you can roll the transfer tape back on the mirror, press it with your squeegee and peel off.
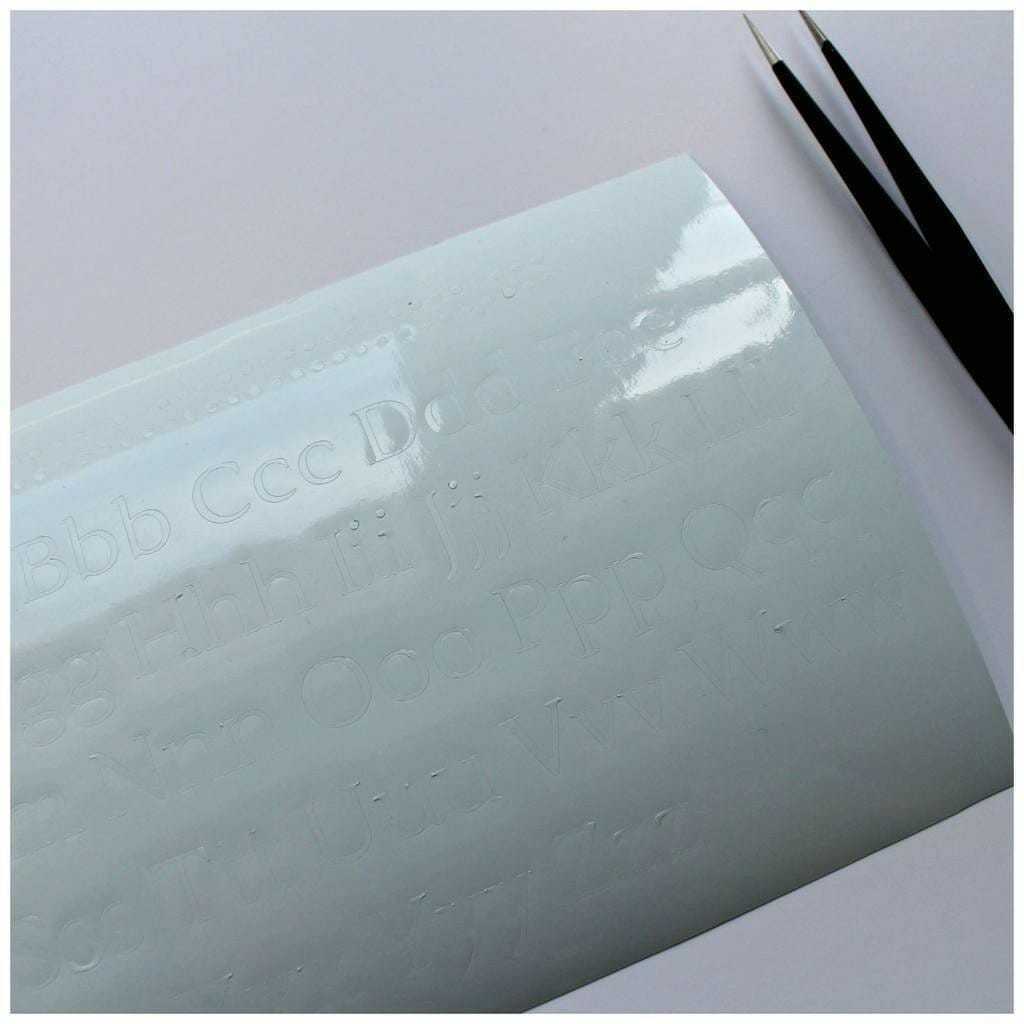
9. The “Just in case” sheet
Every customer will receive a “Just in case” sheet with vinyl letters and dots of the letter ‘i’ the same font size.
In the unlikely event of a few letters not being able to stick on the mirror, you can get them directly from the “Just in case” sheet with pointy tweezers and place them on the mirror separately.
10. Clean
To finish the table plan, use a dry clean glass cloth. Don’t worry to go over the letters with the cloth.
They will not come off, so even if there is finger marks between the lines and the names, you can wipe and polish off.
MIRROR TABLE PLAN
We specialise in custom table plans.
Create a timeless, glamorous mirror table plan.